Our code here can be downloaded. Also, you can install the APK on your Android device if you want a live demo:
We'll create 2 layout files. This is our user interface stuff.
Codes below are shown based on when the file is created. Please read comments on code.
The first file we've created is of course, our
MainActivity.java and
activity_main.xmlMainActivity.javapackagecom.example.Activities;
/*
* http://codeofaninja.com/
* code from the code of a ninja
*/
importjava.util.List;
importcom.example.Objects.LocationObject;
importcom.example.OnClickListeners.ButtonCreateLocationOnClickListener;
importcom.example.OnClickListeners.TextViewLocationItemOnClickListener;
importcom.example.TableControllers.LocationTableController;
importcom.example.sqlitedatabase.R;
importandroid.os.Bundle;
importandroid.util.Log;
importandroid.widget.Button;
importandroid.widget.LinearLayout;
importandroid.widget.TextView;
importandroid.app.Activity;
publicclassMainActivityextendsActivity {
// for debugging purposes
publicstaticfinalStringLOG_TAG="MainActivity.java";
@Override
publicvoidonCreate(BundlesavedInstanceState) {
super.onCreate(savedInstanceState);
setContentView(R.layout.activity_main);
try {
// create location button
Button buttonCreateLocation = (Button) findViewById(R.id.buttonCreateLocation);
// create location button's on click listener
// it will pop up the locations add form
buttonCreateLocation
.setOnClickListener(newButtonCreateLocationOnClickListener());
// show records to user (from the database)
showRecords();
} catch (NullPointerException e) {
e.printStackTrace();
} catch (Exception e) {
e.printStackTrace();
}
}
publicvoidshowRecords() {
try {
Log.v(LOG_TAG, "Showing records.");
// count records, show it by appending to existing text view
appendRecordCount();
// load the linear layout where our location record text view will
// be added
LinearLayout linearLayoutLocationRecords = (LinearLayout) findViewById(R.id.linearLayoutLocationRecords);
// remove current contents first, so we can load new contents
linearLayoutLocationRecords.removeAllViews();
// initialize controller
LocationTableControllerLocationTableC=newLocationTableController(
MainActivity.this);
// read record
List<LocationObject> locations =LocationTableC.read();
if (locations.size() >0) {
// loop through each record in the database
for (LocationObject obj : locations) {
// the texts that will be seen
int locationId = obj.locationId;
String locationName = obj.locationName;
String locationDescription = obj.locationDescription;
// make the TextView ready
TextView textViewLocationItem =newTextView(this);
// set the tag so that we can know what record to delete
textViewLocationItem.setTag(Integer.toString(locationId));
// set the TextView contents
String textViewContents = locationId +". "+ locationName
+"\n"+ locationDescription;
textViewLocationItem.setText(textViewContents);
// set the on click listener for pop up options of edit or
// delete
textViewLocationItem
.setOnClickListener(newTextViewLocationItemOnClickListener());
// just add some padding
textViewLocationItem.setPadding(3, 8, 3, 8);
// finally, add the TextView on the list
linearLayoutLocationRecords.addView(textViewLocationItem);
}
} else {
// no records yet
// prepare our TextView
TextView locationItem =newTextView(this);
locationItem.setPadding(8, 8, 8, 8);
locationItem.setText("No records yet.");
// show to user that there are no records yet.
linearLayoutLocationRecords.addView(locationItem);
}
} catch (NullPointerException e) {
e.printStackTrace();
} catch (Exception e) {
e.printStackTrace();
}
}
/*
* This method will show the user the number of records.
*/
publicvoidappendRecordCount() {
try {
// initialize controller
LocationTableControllerLocationTableC=newLocationTableController(
MainActivity.this);
// read record
int recordCount =LocationTableC.count();
// the text view where we will put our record count
TextView textViewSomeNotes = (TextView) findViewById(R.id.textViewRecordCount);
textViewSomeNotes.setText(recordCount +" records found.");
} catch (NullPointerException e) {
e.printStackTrace();
} catch (Exception e) {
e.printStackTrace();
}
}
}
activity_main.xml code
<RelativeLayoutxmlns:android="http://schemas.android.com/apk/res/android"
xmlns:tools="http://schemas.android.com/tools"
android:layout_width="match_parent"
android:layout_height="match_parent">

<!-- will pop up add form when clicked -->

<Button
android:id="@+id/buttonCreateLocation"
android:layout_width="wrap_content"
android:layout_height="wrap_content"
android:text="Create Location" />

<!-- Just some note to the user. -->

<TextView
android:id="@+id/textViewSomeNotes"
android:layout_width="wrap_content"
android:layout_height="wrap_content"
android:layout_below="@+id/buttonCreateLocation"
android:padding="1dp"
android:text="Below is the list of Locations from the database. Click an item to Edit or Delete. Scroll if you believe the list is long." />

<TextView
android:id="@+id/textViewRecordCount"
android:layout_width="wrap_content"
android:layout_height="wrap_content"
android:layout_below="@+id/textViewSomeNotes"
android:text="0 records found"
android:padding="1dp" />

<!-- We use ScrollView so that when there are many names added, it is still possible to see all of them by scrolling -->

<ScrollView
android:id="@+id/scrollView1"
android:layout_width="match_parent"
android:layout_height="wrap_content"
android:layout_below="@+id/textViewRecordCount">

<!-- ScrollView always has only one child layout, in our case, child layout is the LinearLayout -->

<LinearLayout
android:id="@+id/linearLayoutLocationRecords"
android:layout_width="match_parent"
android:layout_height="match_parent"
android:orientation="vertical">

<!-- This is where the list of Names text views will be added -->
</LinearLayout>
</ScrollView>

</RelativeLayout>
Our
LocationObject.java code, it represents our location details or fields. We don't have to use getters/setters here. :)
packagecom.example.Objects;

/*
 * We won't need getters/setters
 */
publicclassLocationObject {

publicint locationId;
publicString locationName;
publicString locationDescription;

// constructor for adding
publicLocationObject(StringlocationName, StringlocationDescription){
this.locationName = locationName;
this.locationDescription = locationDescription;
    }

//constructor for updating
publicLocationObject(intlocationId, StringlocationName, StringlocationDescription){
this.locationId = locationId;
this.locationName = locationName;
this.locationDescription = locationDescription;
    }

}
Since we are already using a database operation in our MainActivity (showing of records), we'll have to create our
DatabaseHandler.javapackagecom.example.Handlers;
importcom.example.TableHelpers.LocationTableHelper;
importandroid.content.Context;
importandroid.database.sqlite.SQLiteDatabase;
importandroid.database.sqlite.SQLiteOpenHelper;
/*
* This class will handle the database name, upgrade, table helpers, dropping and creating tables.
*
* Table helper and controller codes can be put here
* but we chose to put it in different files so it will be easier to read,
* implement code re-use, and make it easier to manage and debug,
* especially if you have lots of database tables.
*/
publicclassDatabaseHandlerextendsSQLiteOpenHelper {
// for our logs
publicstaticfinalStringLOG_TAG="DatabaseHandler.java";
// database version
privatestaticfinalintDATABASE_VERSION=7;
// database name
protectedstaticfinalStringDATABASE_NAME="NinjaDatabase1";
// table helpers
publicLocationTableHelperLocationTableH;
// constructor
publicDatabaseHandler(Contextcontext) {
super(context, DATABASE_NAME, null, DATABASE_VERSION);
// instantiate our table helper.
LocationTableH=newLocationTableHelper();
}
// creating Tables
@Override
publicvoidonCreate(SQLiteDatabasedb) {
LocationTableH.createTable(db);
}
/*
* When upgrading the database, it will drop the current tables and recreate.
*/
@Override
publicvoidonUpgrade(SQLiteDatabasedb, intoldVersion, intnewVersion) {
LocationTableH.dropTable(db);
onCreate(db);
}
}
Related to the code above is our
LocationsTableHelper.java. It contains our code for creating and dropping the locations table.
packagecom.example.TableHelpers;

importandroid.database.sqlite.SQLiteDatabase;

publicclassLocationTableHelper {

publicString tableName ="locations";

publicString fieldLocationId ="id";
publicString fieldLocationName ="name";
publicString fieldLocationDescription ="description";

/*
     * Create the table.
     */
publicvoidcreateTable(SQLiteDatabasedb) {
try {
String sql ="";

            sql +="CREATE TABLE "+ tableName;
            sql +=" ( ";
            sql += fieldLocationId +" INTEGER PRIMARY KEY AUTOINCREMENT, ";
            sql += fieldLocationName +" TEXT, ";
            sql += fieldLocationDescription +" TEXT ";
            sql +=" ) ";

            db.execSQL(sql);
        } catch (NullPointerException e) {
            e.printStackTrace();
        } catch (Exception e) {
            e.printStackTrace();
        }
    }

/*
     * Drop the table.
     */
publicvoiddropTable(SQLiteDatabasedb) {
try {
String sql ="DROP TABLE IF EXISTS "+ tableName;
            db.execSQL(sql);
        } catch (NullPointerException e) {
            e.printStackTrace();
        } catch (Exception e) {
            e.printStackTrace();
        }
    }
}
And the code where all the database operation of our locations table will be accessed is the LocationsTableController.java
packagecom.example.TableControllers;

importjava.util.ArrayList;
importjava.util.List;

importandroid.content.ContentValues;
importandroid.content.Context;
importandroid.database.Cursor;
importandroid.database.sqlite.SQLiteDatabase;
importandroid.util.Log;

importcom.example.Handlers.DatabaseHandler;
importcom.example.Objects.LocationObject;

/*
 * This class will control all the locations table activities such as
 * creating, reading (single and all), updating, deleting (single and all), and counting location records.
 */
publicclassLocationTableControllerextendsDatabaseHandler {

publicLocationTableController(Contextcontext) {
super(context);
    }

/*
     * Create location record.
     *
     * @param - location contains location details to be added as single row.
     */
publicvoidcreate(LocationObjectlocation) {

try {

ContentValues values =newContentValues();

            values.put(LocationTableH.fieldLocationName, location.locationName);

            values.put(LocationTableH.fieldLocationDescription,
                    location.locationDescription);

SQLiteDatabase db =this.getWritableDatabase();

            db.insert(LocationTableH.tableName, null, values);
            db.close();

        } catch (NullPointerException e) {
            e.printStackTrace();
        } catch (Exception e) {
            e.printStackTrace();
        }
    }

/*
     * Read all location record.
     */
publicList<LocationObject>read() {

List<LocationObject> recordsList =newArrayList<LocationObject>();

try {

// select query
String sql ="";
            sql +="SELECT * FROM "+LocationTableH.tableName;
            sql +=" ORDER BY "+LocationTableH.fieldLocationId +" DESC";

SQLiteDatabase db =this.getWritableDatabase();

// execute the query
Cursor cursor = db.rawQuery(sql, null);

// looping through all rows and adding to list
if (cursor.moveToFirst()) {
do {

int locationId =Integer.parseInt(cursor.getString(cursor
                            .getColumnIndex(LocationTableH.fieldLocationId)));

String locationName = cursor.getString(cursor
                            .getColumnIndex(LocationTableH.fieldLocationName));

String locationDescription = cursor
                            .getString(cursor
                                    .getColumnIndex(LocationTableH.fieldLocationDescription));

LocationObject location =newLocationObject(locationId,
                            locationName, locationDescription);

// add to list
                    recordsList.add(location);

                } while (cursor.moveToNext());
            }

// close the database
            db.close();

        } catch (NullPointerException e) {
            e.printStackTrace();
        } catch (Exception e) {
            e.printStackTrace();
        }

// return the list of records
return recordsList;
    }

/*
     * Update location record.
     *
     * @param id - will identify which record is to be updated.
     *
     * @param name - the new location name to be saved.
     *
     * @param description - the new location description to be saved.
     */
publicvoidupdate(intid, Stringname, Stringdescription) {

try {
Log.v("LOGHERE", "desc: "+ description);
ContentValues values =newContentValues();

            values.put(LocationTableH.fieldLocationName, name);
            values.put(LocationTableH.fieldLocationDescription, description);

// you can use AND if you have multiple conditions
String where =LocationTableH.fieldLocationId +" = ?";

// you should use commas when you have multiple conditions
String[] whereArgs = { Integer.toString(id) };

SQLiteDatabase db =this.getWritableDatabase();

// use the update command
            db.update(LocationTableH.tableName, values, where, whereArgs);
            db.close();

        } catch (NullPointerException e) {
            e.printStackTrace();
        } catch (Exception e) {
            e.printStackTrace();
        }
    }

/*
     * Delete location record.
     *
     * @param id - to identify which location record is to be deleted.
     */
publicbooleandelete(Stringid) {
boolean deleteSuccessful =false;

try {

SQLiteDatabase db =this.getWritableDatabase();
            deleteSuccessful = db.delete(LocationTableH.tableName, "id ='"+ id
+"'", null) >0;
            db.close();

        } catch (NullPointerException e) {
            e.printStackTrace();
        } catch (Exception e) {
            e.printStackTrace();
        }

return deleteSuccessful;

    }

/*
     * Retrieve single record.
     *
     * @param id - to identify which location record data is to be returned.
     */
publicLocationObjectgetLocation(intid) {

LocationObject location =null;

try {

// select query
String sql ="";
            sql +="SELECT * FROM "+LocationTableH.tableName;
            sql +=" ORDER BY "+LocationTableH.fieldLocationId +" DESC";

SQLiteDatabase db =this.getWritableDatabase();

// execute the query
Cursor cursor = db.rawQuery(sql, null);

// looping through all rows and adding to list
if (cursor.moveToFirst()) {

int locationId =Integer.parseInt(cursor.getString(cursor
                        .getColumnIndex(LocationTableH.fieldLocationId)));

String locationName = cursor.getString(cursor
                        .getColumnIndex(LocationTableH.fieldLocationName));

String locationDescription = cursor
                        .getString(cursor
                                .getColumnIndex(LocationTableH.fieldLocationDescription));

                location =newLocationObject(locationId, locationName,
                        locationDescription);

            }

// close the database
            db.close();

        } catch (NullPointerException e) {
            e.printStackTrace();
        } catch (Exception e) {
            e.printStackTrace();
        }

return location;

    }

/*
     * Count all location records.
     */
publicintcount() {

// select query
SQLiteDatabase db =this.getWritableDatabase();

String sql ="SELECT * FROM "+LocationTableH.tableName;
int recordCount = db.rawQuery(sql, null).getCount();
        db.close();

return recordCount;

    }

/*
     * Delete ALL accounts receivable record.
     *
     * More efficient way is to delete and then recreate it.
     * http://stackoverflow.com/a/4280131/903298
     *
     * You can call it from an on click listener too. :)
     */
publicvoiddeleteAll() {
try {

LocationTableH.dropTable(this.getWritableDatabase());
LocationTableH.createTable(this.getWritableDatabase());

        } catch (NullPointerException e) {
            e.printStackTrace();
        } catch (Exception e) {
            e.printStackTrace();
        }
    }
}
We'll create the location_form layout to be inflated on the "add form" pop up. Here's the code for our
location_form.xml<RelativeLayoutxmlns:android="http://schemas.android.com/apk/res/android"
xmlns:tools="http://schemas.android.com/tools"
android:layout_width="match_parent"
android:layout_height="match_parent">
<!-- Text field where the location name will be entered. -->
<EditText
android:id="@+id/editTextLocationName"
android:layout_width="match_parent"
android:layout_height="wrap_content"
android:layout_alignParentLeft="true"
android:layout_alignParentTop="true"
android:ems="10"
android:hint="Location Name"
android:singleLine="true">
<requestFocus />
</EditText>
<!-- Text field where the location description will be entered. -->
<EditText
android:id="@+id/editTextLocationDescription"
android:layout_width="match_parent"
android:layout_height="wrap_content"
android:layout_alignParentLeft="true"
android:layout_below="@+id/editTextLocationName"
android:ems="10"
android:hint="Location Description"
android:singleLine="true" />
</RelativeLayout>
Since we have specified our ButtonCreateLocationOnClickListener on the MainActivity, here's the code of our ButtonCreateLocationOnClickListener.java that will pop up form to add a location.
packagecom.example.OnClickListeners;

importcom.example.Activities.MainActivity;
importcom.example.Objects.LocationObject;
importcom.example.TableControllers.LocationTableController;
importcom.example.sqlitedatabase.R;

importandroid.app.AlertDialog;
importandroid.content.Context;
importandroid.content.DialogInterface;
importandroid.view.LayoutInflater;
importandroid.view.View;
importandroid.view.View.OnClickListener;
importandroid.widget.EditText;
importandroid.widget.Toast;

publicclassButtonCreateLocationOnClickListenerimplementsOnClickListener {

@Override
publicvoidonClick(Viewv) {
try {

// get the context
finalContext mContext = v.getContext();

// inflate our location_form.xml
LayoutInflater inflater = (LayoutInflater) mContext
                    .getSystemService(Context.LAYOUT_INFLATER_SERVICE);
finalView formElementsView = inflater.inflate(
R.layout.location_form, null, false);

// You have to list down your form elements, we have two EditText
finalEditText editTextLocationName = (EditText) formElementsView
                    .findViewById(R.id.editTextLocationName);

finalEditText editTextLocationDescription = (EditText) formElementsView
                    .findViewById(R.id.editTextLocationDescription);

// the alert dialog
newAlertDialog.Builder(mContext)
                    .setView(formElementsView)
                    .setTitle("codeofaninja.com")
                    .setPositiveButton("Add",
newDialogInterface.OnClickListener() {

publicvoidonClick(DialogInterfacedialog,
intid) {

// save the values
String locationName = editTextLocationName
                                            .getText().toString();

String locationDescription = editTextLocationDescription
                                            .getText().toString();

// set the values from those EditText
LocationObject location =newLocationObject(
                                            locationName, locationDescription);

// create the new record
newLocationTableController(mContext)
                                            .create(location);

// retrieve the records
                                    ((MainActivity) mContext).showRecords();

// tell the user it was added
Toast.makeText(mContext,
"Location item was added.",
Toast.LENGTH_SHORT).show();

                                    dialog.cancel();
                                }

                            }).show();

        } catch (NullPointerException e) {
            e.printStackTrace();
        } catch (Exception e) {
            e.printStackTrace();
        }
    }

}
Our records is listed when the ActivityMain was called, here's the on click listener that will pop up an edit or delete option to the user when a location item was clicked, the file is
TextViewLocationItemOnClickListener.javapackagecom.example.OnClickListeners;
importcom.example.Activities.MainActivity;
importcom.example.Objects.LocationObject;
importcom.example.TableControllers.LocationTableController;
importcom.example.sqlitedatabase.R;
importandroid.app.AlertDialog;
importandroid.content.Context;
importandroid.content.DialogInterface;
importandroid.view.LayoutInflater;
importandroid.view.View;
importandroid.view.View.OnClickListener;
importandroid.widget.EditText;
importandroid.widget.Toast;
publicclassTextViewLocationItemOnClickListenerimplementsOnClickListener {
// make a context property
Context mContext;
/*
* This method will run when the user clicked a location item on the list.
*
* It will show a pop up with options to edit or delete the clicked location
* item.
*/
@Override
publicvoidonClick(Viewv) {
// get the context
mContext = v.getContext();
// get the tag we set earlier as the unique location ID
finalString id = v.getTag().toString();
// prepare the options
finalCharSequence[] items = { "Edit", "Delete" };
// show the options in a dialog
newAlertDialog.Builder(mContext).setTitle("Location Item")
.setItems(items, newDialogInterface.OnClickListener() {
publicvoidonClick(DialogInterfacedialog, intitem) {
// instantiate our locations table.
LocationTableControllerLocationTableC=newLocationTableController(
mContext);
// edit
if (item ==0) {
// pops up the edit form
editLocation(Integer.parseInt(id));
}
// delete
elseif (item ==1) {
// delete using the table controller
if (LocationTableC.delete(id)) {
// tell the user the record was deleted.
Toast.makeText(mContext,
"Location item was deleted.",
Toast.LENGTH_SHORT).show();
// show the updated list to the user
((MainActivity) mContext).showRecords();
}
}
dialog.dismiss();
}
}).show();
}
/*
* This method will pop up an AlertDialog with the edit form.
*
* @param - locationId is the unique database ID of the selected location
* record.
*/
publicvoideditLocation(finalintlocationId) {
try {
// new instance of our table
finalLocationTableControllerLocationTableC=newLocationTableController(
mContext);
// read current value based on location id
LocationObject location =LocationTableC.getLocation(locationId);
// inflate our location_form XML which is location in
// res/layout/location_form.xml
LayoutInflater inflater = (LayoutInflater) mContext
.getSystemService(Context.LAYOUT_INFLATER_SERVICE);
finalView formElementsView = inflater.inflate(
R.layout.location_form, null, false);
// listing down our form elements
finalEditText editTextLocationName = (EditText) formElementsView
.findViewById(R.id.editTextLocationName);
finalEditText editTextLocationDescription = (EditText) formElementsView
.findViewById(R.id.editTextLocationDescription);
// set value to our form EditTexts
editTextLocationName.setText(location.locationName);
editTextLocationDescription.setText(location.locationDescription);
// the alert dialog with our form
newAlertDialog.Builder(mContext)
.setView(formElementsView)
.setTitle("codeofaninja.com")
.setPositiveButton("Save Changes",
newDialogInterface.OnClickListener() {
publicvoidonClick(DialogInterfacedialog,
intid) {
// update the record
LocationTableC.update(locationId,
editTextLocationName.getText()
.toString(),
editTextLocationDescription
.getText().toString());
// tell the user it was updated
Toast.makeText(mContext,
"Location item was updated.",
Toast.LENGTH_SHORT).show();
// show the updated list to the user
((MainActivity) mContext).showRecords();
dialog.cancel();
}
}).show();
} catch (NullPointerException e) {
e.printStackTrace();
} catch (Exception e) {
e.printStackTrace();
}
}
}
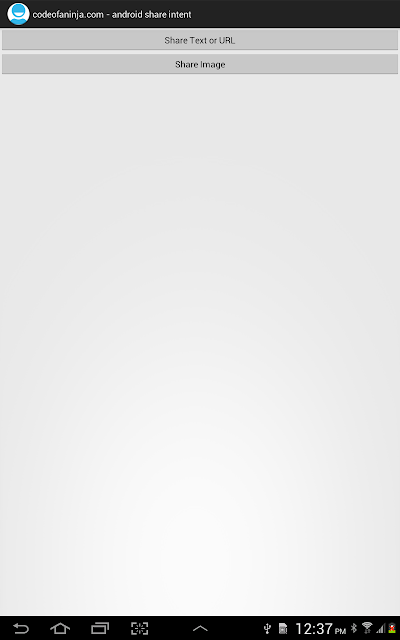
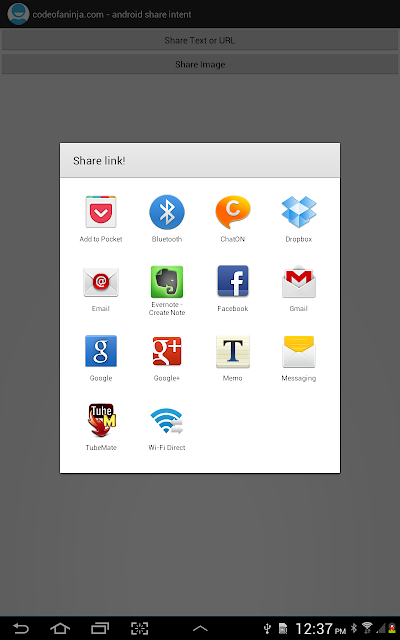
Output Screenshots:


 - Run")